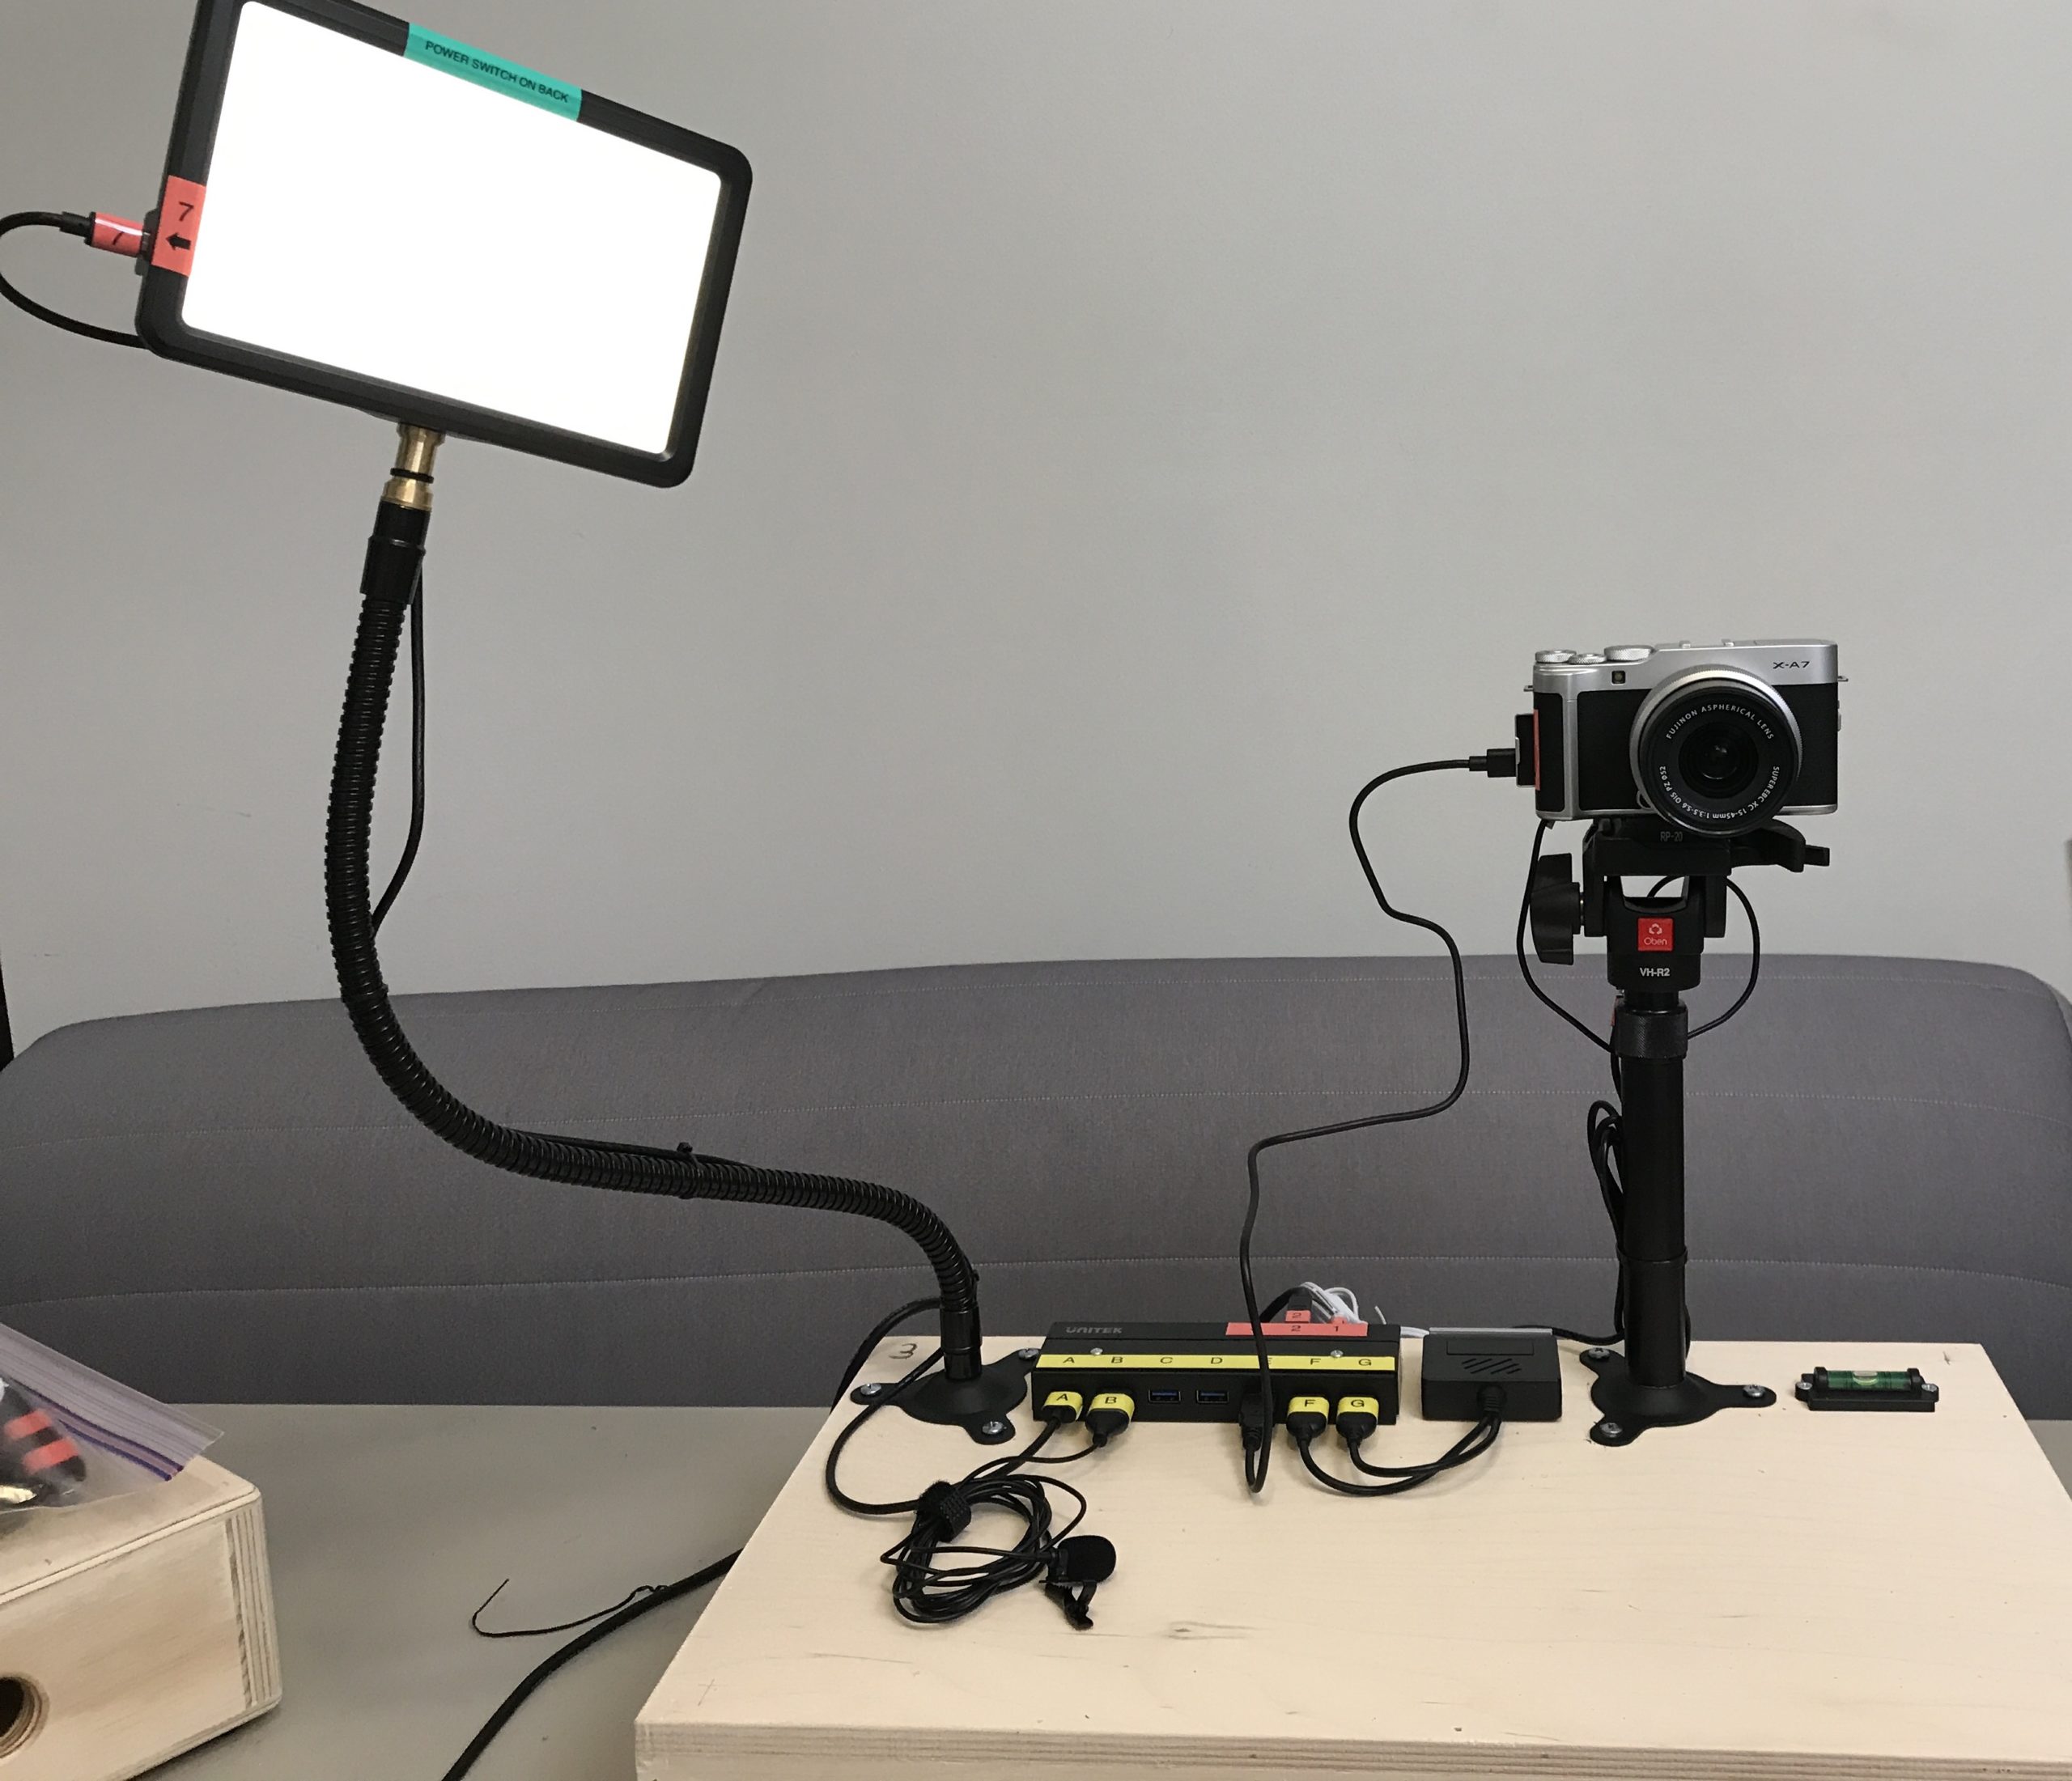
Webcam Station
Built on top of a ‘half apple box’ the Webcam Station connects to the presenter’s own laptop with one USB cable, providing an HD camera feed, a lavalier microphone, and a dimmable bi-color light source. The kit is designed and packed for safe shipping, and is labeled with color-coded connections for easy setup by anyone.

STEP 1: UNBOX
- Remove the shipping label from the plastic sleeve, flip over the double-sided paper, and it becomes your return label.
- These units are packed tightly in the box to ensure safe transport. Please make sure to take the camera and microphone out of the box before removing the rest of the station.
- As you’ll see in the video, you’ll need to pull the station out by the monopod stalk, while pushing down on the corner of the box. Once you pull it up, you should be able to access the wooden box handle.
- Please save all packaging, and re-pack it in the same way you receive it when you return it to us!
STEP 2: ATTACH THE CAMERA
- Place the wooden box on a flat surface. Make sure the bubble in the level is centered.
- You may need to put the monopod head into ‘receiving mode.’ You do this by squeezing the two levers together with your right hand, and pushing them towards the back of the monopod until you hear a click.
STEP 3: PLUG IT IN!
- For Red # 1, 2, 3: Connect to Hub as shown, and to (1) Power Outlet, (2) Your Computer, and (3) Internet Router (if possible).
- Make sure the big switch is set to the Red “Off” position.
- Yellow “B” is the microphone which came in a ziplock bag.
- Depending on the specific configuration, you may not need a connection for each letter!
STEP 5: TURN IT ON
- Power on the light. If you press for three seconds and no light turns on, try turning the dials slightly. Don’t worry about the warm vs. cool light during setup. We’ll cover that during out tech setup call..
- Turn the Camera ON using the button on top of the camera.
- Flip the switch from Red OFF to Green ON.
STEP 6: COMPUTER SETTINGS
- In your web conferencing app (i.e. Zoom, WebEx, Google Meet, Skype) you will need to assign the camera and microphone.
- Camera: “FUJIFILM X-A7”
- Microphone: This can vary. Options include: “Realtek USB2.0 Audio” or “Microphone” or “Movo USB”. If you don’t see one of these, try using the one you don’t recognize from past videoconferences.
- Speaker: Use your standard computer speakers.
If you are still having trouble setting up your Webcam Station after following these instructions, don’t panic! We always schedule a setup call to finish setup and add any final touches.
